Contents:
Short log of building “Makeblock Constructor I” 3D printer.
Few issues were solved in order to bring it into fully working state.
What is it
Makeblock is a Chinese company making aluminium extrusion beams and a whole lot of products based on that, mainly electronically controlled mechanisms.
Makeblock Constructor I is their first 3D printer, and there is second model exists, called mElephant. In accordance with Makeblock’s usual workflow, Constructor I consists mostly from off-the-shelf parts (highly reusable), while next their model is made specifically to the task, comes preassembled and has surprisingly low amount of repurposable parts.
Constructor I is based on off-the-shelf Ramps 1.4 controller board. Surprisingly, they switched to their own controller board (still Arduino compatible, no surprizes there) only in their mGiraffe delta 3D printer. It’s said that mElephant is also based on Ramps 1.4.
I should say that even if mElephant looks like it has more solid frame, Constructor I’s frame is very solid too. No issues there. Only one thing I keep thinking about is a printing head mounting point. Single angled bracket doesn’t look like the best solution, but it does the job well so far.
Preparing for possible upgrades I got some more hardware from Makeblock, but there is almost no modifications so far as it will be seen below.
Building
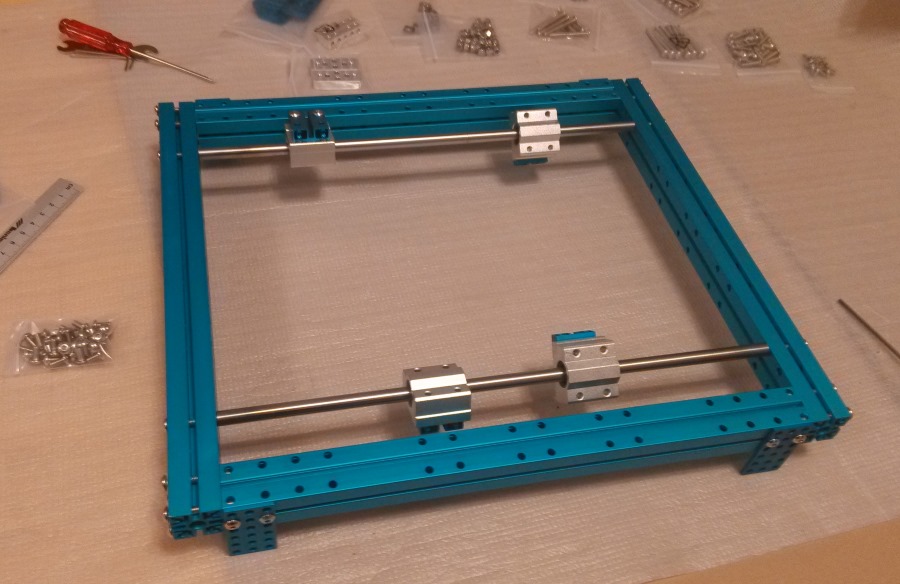
Frame
The simplest part. Just follow the assembly instructions.

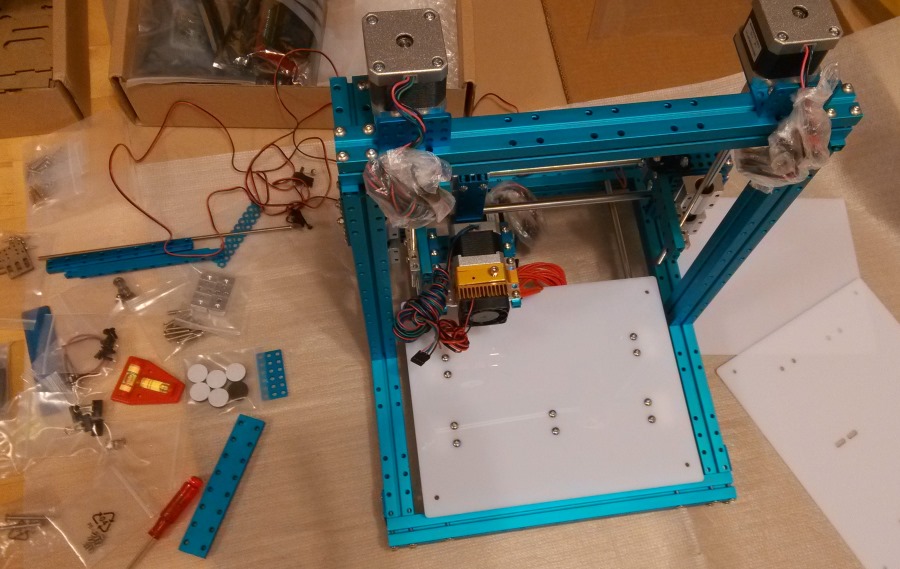
Electronics
All wires came with presoldered connectors, but with good margin of length. I decided to left it as is before it will be obvious what kinds of modifications I will do in the future. So it’s quite messy up here now.
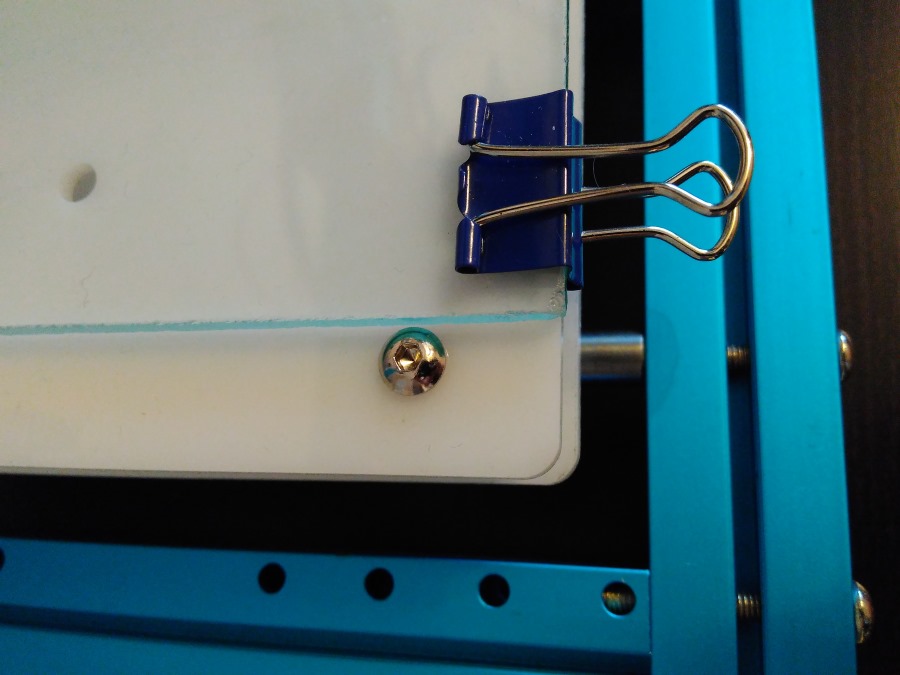
In order to keep electronics accessible, I’ve mounted front panel on a lower border of the box.

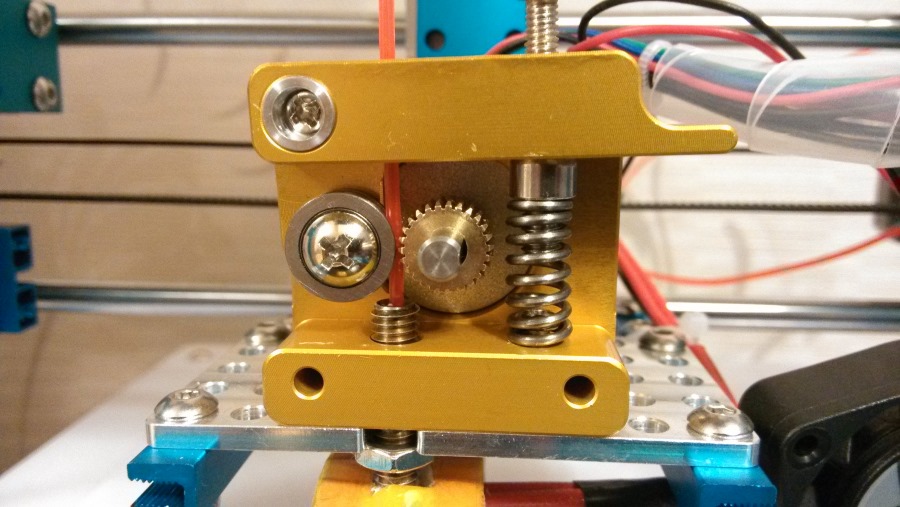
Printing head assembly
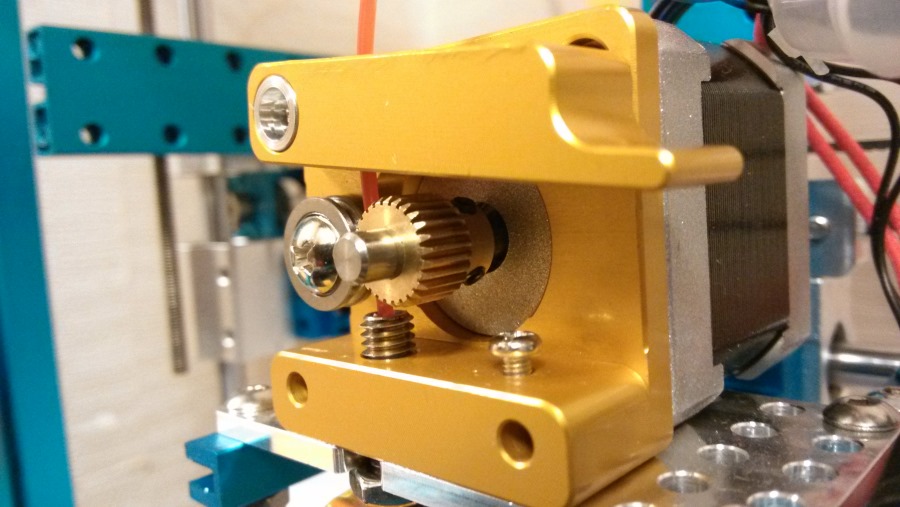
After connecting electronics I tried to turn on the printer and move some motors. Almost everything was OK, except the fact that filament was not going through printing head.
I’ve checked wiring few times before I finally noticed that motor spindle is rotating, but there is no torque to pull the filament.
Printing head is the only thing that came preassembled, so I started disassembling it. After removing cooling fan and heatsink I discovered that filament drive gear is not tightened to shaft at all and can rotate freely and pulled away from shaft. Tightening it properly solved the issue. Spring was removed in order to get access to tightening screw.
Lubrication
Another thing that became clear after turning on is that lubrication required for Z-axis threaded rods. It was doing extremely annoying squeaky sounds.
After some research I bought this thing:
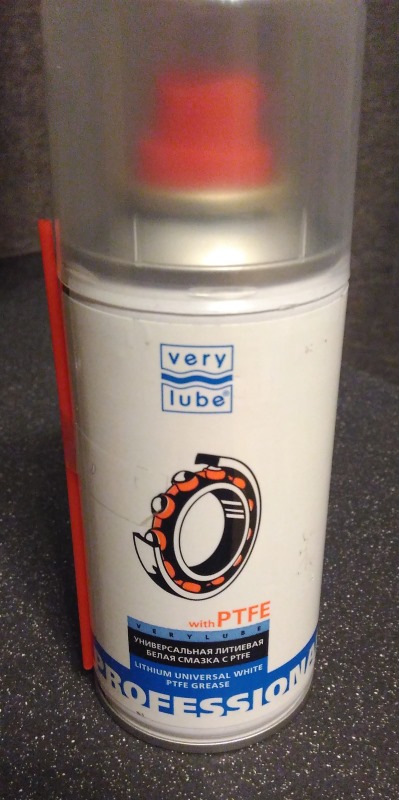

After some time it doesn’t look all that white, but works good. Although I need to devise a better way to spray it over the threaded rod but keep all surrounding surfaces from getting their portion of grease.
PTFE filled oil should be good choice in general. Check RepRap wiki for details. This is lithium soap combined with PTFE. Not sure if it has right viscosity for linear bearings though.
Other axes are belt-driven and all bearings came prelubricated, so it’s surprizing that Z-axis drive lubrication was left completely for user’s concern.
First print
Makeblock is providing archive with “preconfigured” software (Slic3r with Printrun/Pronterface and Cura) and few models to start with. One of them is spool holder disk. So I just opened that model in Pronterface and started printing.
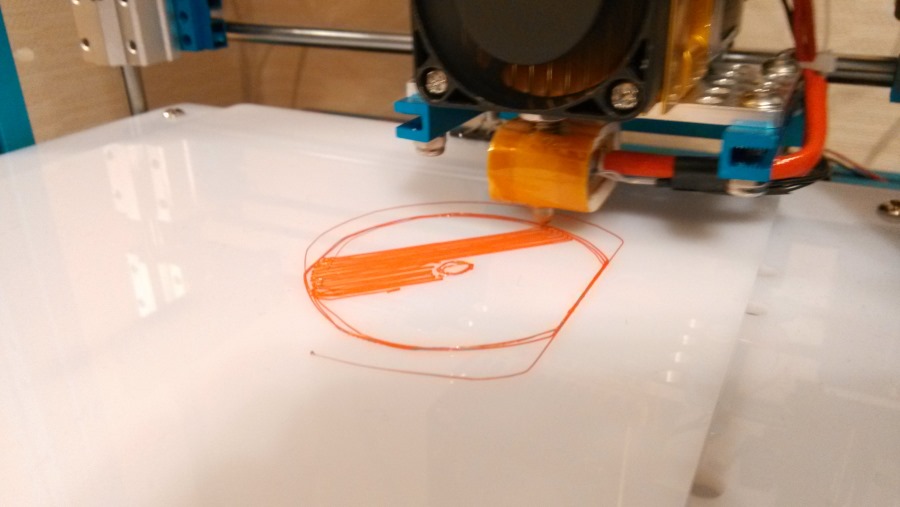
Good news: it definitely able to print.
Bad news: few things went wrong:
- I tried my best aligning printing bed, but plastic is slightly curved;
- there is some adhesion to plastic bed, but after few layers it turn out that it isn’t enough;
- filament is coming out thinner than it should be (software configuration issue);
- and most obvious: print center was somewhere near X-axis endstop (software configuration issue).
All this issues should be addressed before next print.
By the way, Cura got it’s own issues, inverted Z-axis for example. But I didn’t try it again yet.
Addressing discovered issues
Glass
Plastic sheet that came with printer is absolutely hopeless. It is not perfectly flat. So I’ve got a sheet of 4mm glass. With the size of 200x215mm it fits just fine between this 3D printer’s height adjustment screws.
Glue
PLA is not sticking very well to glass (same as plastic before). After little research in the Internet I found that the painter’s tape isn’t working good on a cold bed with PLA either (and I don’t like it anyway). I also tried to use hairspray, but the result was unsatisfactory.
I ran into this blog post which suggests to use glue sticks and shows the difference between sticks made from PVA and PVP. So I’ve got these two glue sticks. ErichKrause one has no ingredients markings on it. Second one is branded for Auchan retail store network - this one is marked as PVP.
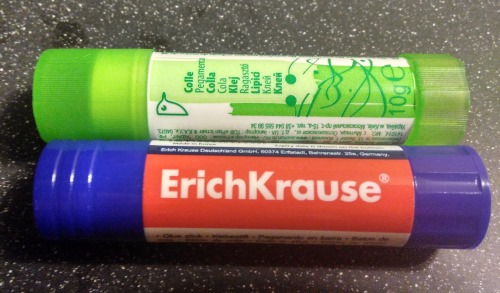
After few prints I can say that ErichKrause glue stick is made of PVA. It is possible to use it on a cold bed with PLA with a big brim and other measures to avoid tearing from a bed.
As for PVP stick, adhesion is extremely strong and it is hard to detach model from a bed after printing without damage. When using brim is undesirable, this is a better option.
Software
I like the manual controls of Printrun/Pronterface. But how it interact with Slic3r is a mystery for me - it isn’t obvious which parameters are overridden and which are not.
As a safe and controllable workflow, I decided to use Slic3r itself to produce gcode files and use pronterface to run them.
After few tries I came with optimal temperature for the filament I have (177°C). I may do this test later to confirm it.
Centering issue was due to improper print area parameters. It was 200x200mm everywhere by default. (Preconfigured software, huh?)

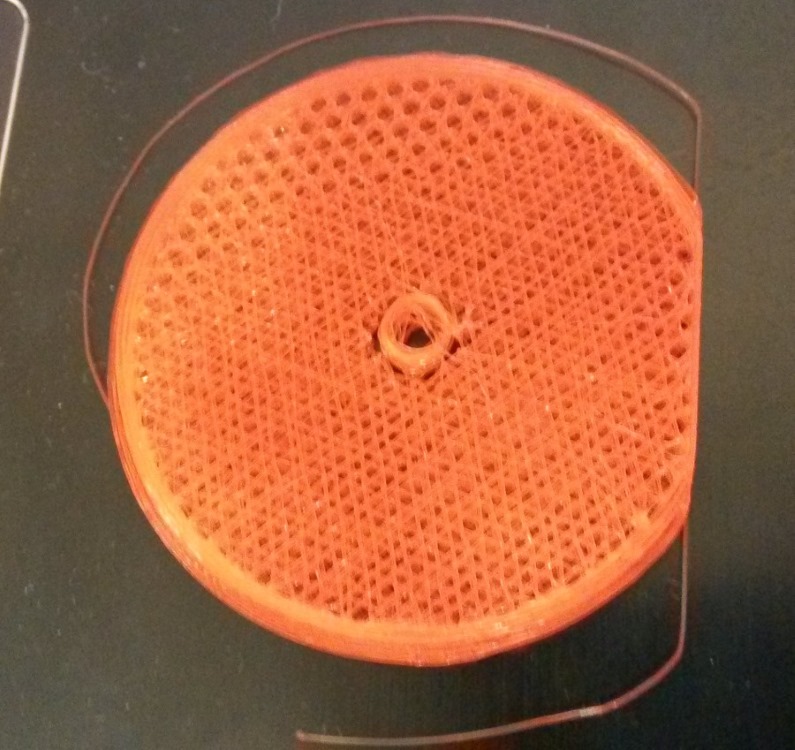
First successful prints
Spool holder disk (two of the same kind actually):

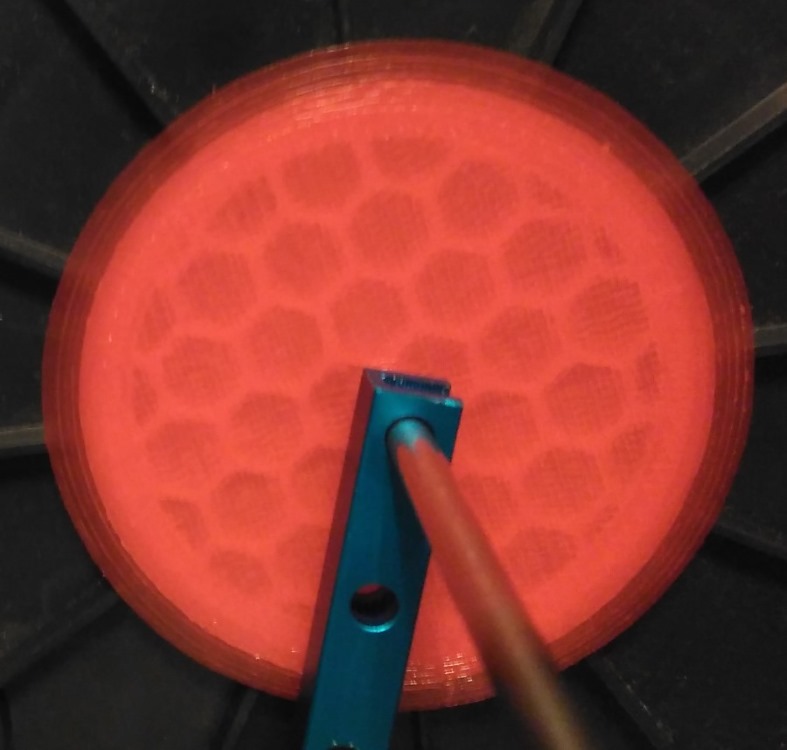
Honeycomb fill pattern in combination with semi-transparent PLA makes a really nice appearance.
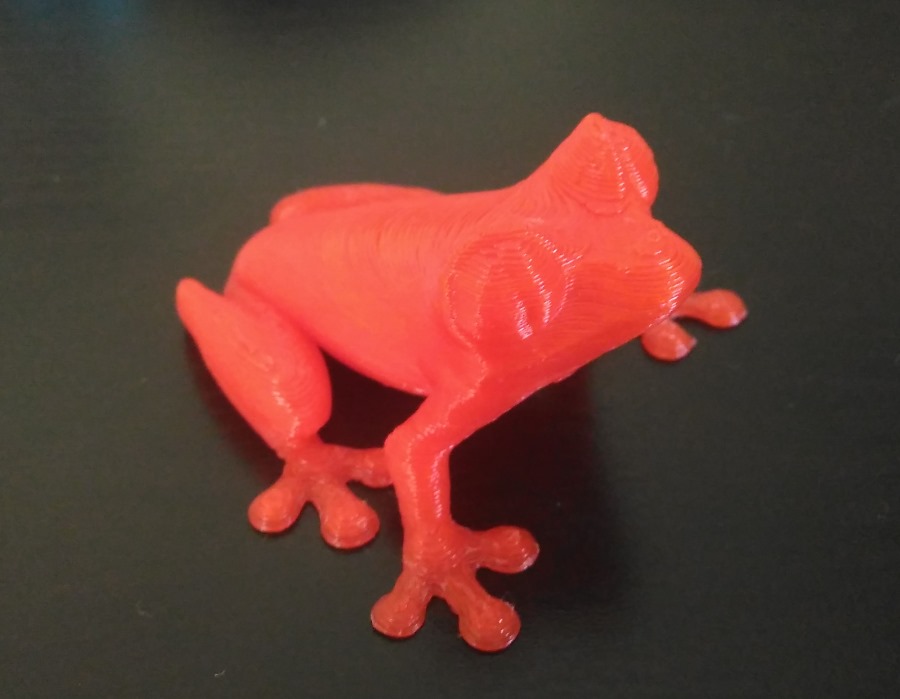
Treefrog (thingiverse):
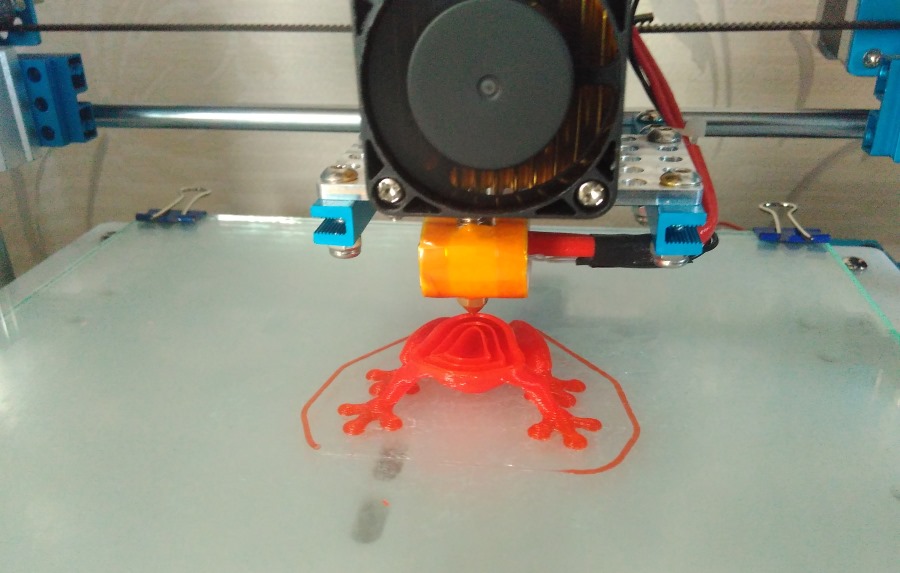
It turned out quite nice. I only got one small issue in overhang area. Printed with 0.25mm layer thickness.
What’s next
Different software?
After looking into AlternativeTo.net I see a whole bunch of stuff to try: Repetier, 123D, MatterControl, Cura.
There were some compatibility issues with Cura somewhile ago. It was temporarily as far as I know, and now there should be a compatible profile. Most likely I should take and update this one.
Printer mods
Someday I will probably try to switch from PLA and cold bed to ABS and heating bed.
I’m considering moving Z-axis endstop from frame to printing head. Or maybe add proximity sensor, as in this blog post.
Make a fan blowing under the nozzle.
Laser engraving
I’m more interested in this experiment. I’ve already got an engraving laser. The most important question now: is it possible to use it interchangeably with printing head without rebuilding the frame to completely different arrangement. Expect for updates on that matter.
