A few things happened recently:
RedPitaya released software update, started to promote themselves a bit more actively and started to charge money for software;
SDR transceiver community app was released by Pavel Demin;
I’ve unshelved my RedPitaya, since I’ve started this blog and got some use for it;
EEVBlog received and reviewed the thing.
First thing I would like to share is the way I’ve tried (and succeeded eventually) to connect RedPitaya to PC - direct cable connection using separate NIC.
RedPitaya — PC — Router — Internet
RedPitaya is intended to be accessed through local network from any web-browsing capable device, so this type of connection is left aside from connection guide as something less universal and more difficult for some users, I think.
If you need it, there is this section of RedPitaya wiki. But I’ve got a bunch of issues on my way to make it work, so I decided to write down my instruction.
UPD: Wow! They (re)moved old manual just before I published this post. Manual still can be seen here. We will see what new version will look like.
Targets:
- Connect RedPitaya (RP) directly to PC by copper;
- Being able to access Bazaar from RP to install apps.
Initial conditions:
- Windows 8.1 PC with two NICs;
- RP with fresh OS image on SD card.
Configuration steps:
Make sure you’re using good power supply and USB cable with RP. It’s kind of annoying “feature” of RP to be able to turn on, but having all sorts of glitches when there is no enough power.
On PC make your connection to router shared. (Second tab in network connection properties.)
Make a decision on your network configuration - which subnetwork and IP addresses to be used. For example:
- Router subnetwork is 192.168.100.0 (255.255.255.0)
- For RP subnetwork I will use 192.168.110.0 (255.255.255.0)
- PC’s second NIC will have IP 192.168.110.101
- RP will have IP 192.168.110.100
On PC assign IP and netmask to second NIC, but left gateway field empty.
On RP SD card edit network configuration files.
There are two of them -
/etc/network/configand/etc/network/interfaces. They’re used for different things AFAIK, but the stupid thing is that there is no clear description how and when they are actually used. I’ve edited both of them. (At least it’s clear that the third file,/etc/network/interfaces.ap, is irrelevant to the task.)- switch from dhcp mode to static;
- for my example IP is 192.168.110.100;
- netmask is 255.255.255.0;
- and gateway is 192.168.110.101.
- RP can configure itself to route wired connection to WiFi AP. Not sure if this will affect network configuration without WiFi adapter, but I switched WiFi mode to client in
/etc/network/configfile. (From boot messages it’s clear that, for some reason, RP is still trying and failing to run it’s own DHCP server.)
Connect everything. Console connection is also required. (Their wiki article naming isn’t very descriptive, that’s for sure.)
If everything goes right, then after booting RP you will be able to access RPs web interface on IP address you configured. But RP is still unable to access Bazaar.
And you have no usable apps at this stage if you started with fresh SD card image. Only demos of paid apps. (It stinks, I should say! Why they started to charge money for very basic stuff and event open source (Scratch)?)
Time to do some configuration through RP console.
(I’ve yet to learn how all the things are configured in systemd, so I’m doing it old style.)
Edit file
/etc/rc.local. There are Vim and Nano editors available to do the job.Insert following commands before
exit 0(change IP addresses to your needs):ifconfig eth0 inet 192.168.110.100 netmask 255.255.255.0 route add default gw 192.168.110.101Default gateway is needed to let RP know that the way to Bazaar leads through PC.
I’ve got a lot of issues when RP was not getting IP address from configuration file (from step 5). When it gets IP, it looks like there is no need to run ifconfig command. But in this case route command has no effect somehow. Therefore both of them are here.
Run the same command(s) in console to achieve their effect without rebooting RP.
Edit file
/etc/resolv.conf. Write working DNS address (your router or Google’s 8.8.4.4 for example).ping google.com(for example) to check Internet access.
All done. Access RP through web interface. Bazaar link should work now. And it should keep working after rebooting RP.
Side note 1
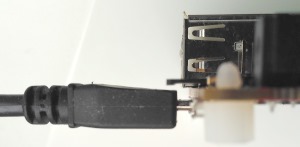
SD slot is too close to micro-USB ports. When I need to remove SD card, but keep console connection intact (it works even without main power cable to allow you to read all output on booting), thick console cable connector may be an issue. I had to cut mine a bit to be able to extract SD-card without disconnecting console cable.
On a picture you can see half-extracted SD over cutted console cable.
Side note 2
Welcome screen of RPs web-interface wasting too much screen space. I wonder if developers working on that matter (especially after EEVBlog review) or waiting when someone get their job done. As a quick fix, I’ve done this:
opened
/www/apps/index.htmlfile on SD card;found and replaced
height: 400;withheight: 600;in two places.
Got horrified by the blend of html, css-in-attributes and js in process of doing that. Is that what happens when hardware engineers do web-design?
Ok. So much for this post. I hope next one will follow soon.
